Welcome to the World of BBQ
Everyone starts somewhere. Maybe you just moved into a place with a backyard, maybe you got a grill as a gift, or maybe you're just tired of paying restaurant prices for a decent burger. Whatever brought you here, grilling is one of the most rewarding cooking skills you can develop, and it is genuinely not that hard to get started.
This guide covers everything you need to go from zero to confidently cooking great food on a grill. No fluff, no gatekeeping, just practical advice that will have you turning out solid meals within your first weekend.
Essential Equipment
You do not need a lot of gear to start grilling. Here is what actually matters:
The non-negotiables:
Nice to have but not essential yet:
Skip the 47-piece grilling tool sets you see at big box stores. Most of those tools will sit in a drawer forever.
Choosing Your First Grill
This decision trips up a lot of people. Here is the honest breakdown:
For most beginners, get a 22-inch Weber Kettle ($130-170). It is charcoal, which means you will actually learn to control fire and heat. It is incredibly versatile - you can grill, smoke, roast, and even bake on it. Parts are widely available, it will last a decade with basic care, and the entire internet is full of tutorials for it. There is a reason it has been the go-to recommendation for decades.
If you really want gas, get a basic 2-3 burner gas grill ($250-400). Weber Spirit or a Char-Broil Performance series are solid entry points. Gas is more convenient - turn a knob and you are cooking in 10 minutes. It is easier for weeknight dinners. You will not get as much smoky flavor, but you can add a smoker box with wood chips later.
What about pellet grills? They are great, but they are really smokers that can grill, not the other way around. At $500-800 for an entry-level model, save this for when you know you want to get into smoking.
Do not overthink it. Any grill will cook great food if you learn to use it properly.
Charcoal 101
If you went with a charcoal grill, you need to understand your fuel.
Briquettes vs. lump charcoal: Briquettes (like Kingsford Blue) burn at a consistent, predictable temperature and last longer. Lump charcoal burns hotter and faster with a more natural flavor. For beginners, start with briquettes. The consistency makes it much easier to learn temperature control.
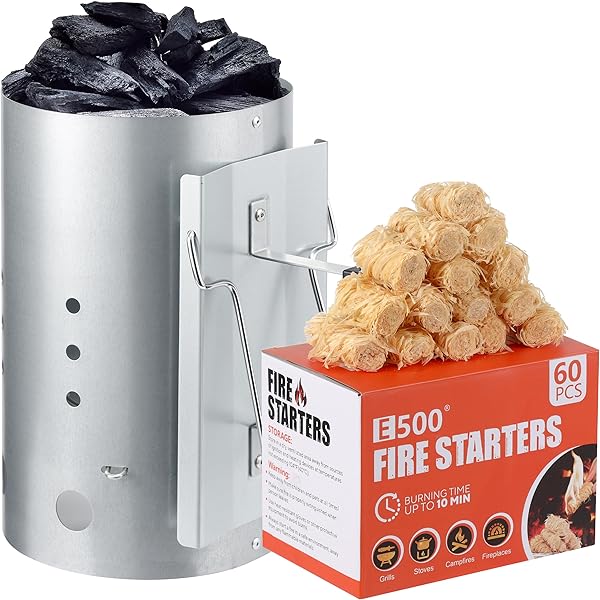
Lighting your charcoal - use a chimney starter. Fill the chimney with charcoal, stuff two sheets of crumpled newspaper or a fire starter cube underneath, light it, and wait 15-20 minutes until the coals on top are ashed over and glowing. Dump them into your grill. That is it.
Never use lighter fluid. It imparts a chemical taste that lingers on your food, it is unnecessary with a chimney starter, and it teaches bad habits. If anyone tells you the fluid "burns off," they are wrong - you can absolutely taste it, especially on quick-cooking foods like burgers.
Two-zone fire setup: This is the most important technique for charcoal grilling. Dump your lit coals on one side of the grill, leaving the other side empty. Now you have a hot direct-heat zone for searing and a cooler indirect zone for gentle cooking or resting food that is done. This single setup handles 90% of everything you will ever cook on a charcoal grill.
Gas Grill Basics
Gas grills are more straightforward but still have a learning curve.
Starting up: Open the lid first (never light with the lid closed - gas buildup can cause a flash), turn on the gas at the tank, then light the burners according to your grill's instructions. Preheat on high with the lid closed for 10-15 minutes. This gets the grates hot enough to sear properly and makes them easier to clean.
Two-zone on gas: Turn one or two burners to medium-high and leave one burner off or on low. Same concept as charcoal - you want a hot zone and a cool zone.
Check your connections: Every spring, do a leak test. Mix dish soap with water, brush it on the gas line connections, and turn on the gas without lighting. If you see bubbles forming, you have a leak that needs fixing before you cook.
Your First Cooks: A Progression Plan
Do not start with a whole brisket. Build your skills with increasingly challenging cooks:
Week 1 - Burgers and hot dogs. Burgers are forgiving, cook fast, and teach you heat management. Form 6-oz patties about 3/4 inch thick, season with salt and pepper, and cook over direct heat for about 3-4 minutes per side for medium (160F internal for safety, or 145F if you ground the meat yourself from whole cuts). Hot dogs just need to be heated through and get some char - impossible to mess up.
Week 2 - Steaks. Get a 1-inch thick ribeye or strip. Season generously with salt and pepper 45 minutes before cooking (or right before - but not 5-10 minutes before, as that draws out moisture). Sear over direct high heat for 3-4 minutes per side, then move to indirect heat until internal temp hits 130F for medium-rare. Rest 5 minutes before cutting.
Week 3 - Chicken thighs. Bone-in, skin-on thighs are the most forgiving cut of chicken. Season them however you like, start skin-side down over medium-direct heat for 5-6 minutes until the skin crisps, then flip and move to indirect heat until internal temperature reaches 165F in the thickest part (usually another 15-20 minutes). Chicken thighs are almost impossible to dry out.
Month 2 - Pork ribs. Now you are getting into real BBQ. Baby back ribs on a kettle using the indirect method take about 4-5 hours at 250-275F. This is where you start learning patience and temperature control over a long cook.
When you are ready - Brisket. This is the final boss. A whole packer brisket takes 12-16 hours and requires real fire management. But if you have built up your skills, you will be ready.
Basic Food Safety
This is not the exciting part, but it matters.
The 5 Most Common Beginner Mistakes
1. Lifting the lid too much. Every time you open the lid, you lose heat and extend your cook time. On a charcoal grill, you are also disrupting airflow. Check your food when you need to flip it or when your thermometer says it is close to target temp. Otherwise, leave it alone. "If you're lookin', you ain't cookin'" is a cliche because it is true.
2. Not preheating the grill. A cold grill means food sticks, you don't get good sear marks, and cooking times are unpredictable. Preheat for at least 10-15 minutes with the lid closed.
3. Pressing down on burgers with a spatula. You are squeezing out juice and fat - the stuff that makes burgers taste good. The burger does not cook faster when you press it. Just leave it alone.
4. Only cooking on high heat. High heat is great for searing steaks, but chicken, ribs, thick chops, and many other foods need medium or indirect heat to cook through without burning the outside. Learn to use your two-zone setup.
5. Not using a thermometer. Cutting into meat to check if it is done lets juices escape and gives you unreliable information anyway. A $35 instant-read thermometer is the difference between guessing and knowing. Experienced pitmasters with decades of cooking still use thermometers.
Simple Seasoning Philosophy
Here is a secret that BBQ snobs will not tell you: salt and coarse black pepper is all you need for most meats. Texas-style brisket, arguably the pinnacle of American BBQ, uses nothing but salt and pepper. A great steak needs nothing but salt and pepper.
Once you are comfortable with the basics, start experimenting. A simple all-purpose rub of salt, pepper, garlic powder, onion powder, and paprika covers a huge range of proteins. But always start with salt and pepper so you learn what the meat itself tastes like when cooked properly.
Keep It Fun
The BBQ community can be intimidating, with people arguing about wood types, rub recipes, and whether wrapping brisket is cheating. Ignore all of that for now. Your goal is to cook food that you and the people you are feeding enjoy eating. There is no wrong way to grill if the result tastes good to you.
Fire up that grill, cook some burgers, and welcome to the club.